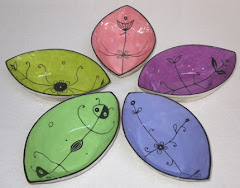
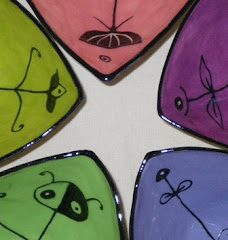
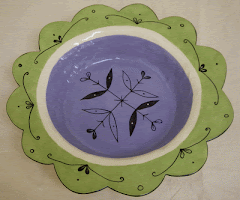
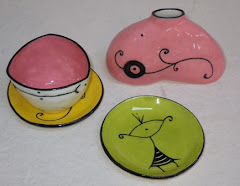
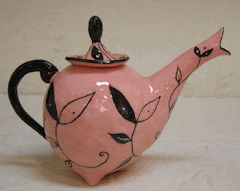
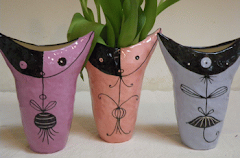
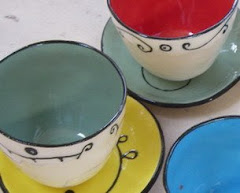
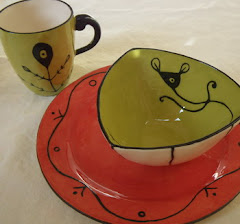
Kri Kri Studio: Celebrating 20 years of production in 2011


Still in use! Sake cup from 1991
pinched by hand with date inscribed
In the beginning I pinched all the sake cups, rice bowls and mugs by hand!
Today, all my originals for the plaster molds are still fashioned in the same way, but slip casting multiples is far more efficient and the results are lighter in weight and more uniform.
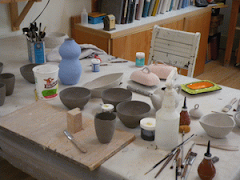
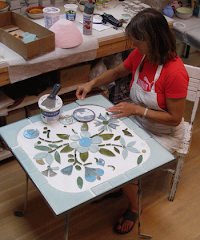
Over the years I've acquired tools to facilitate production, yet it is surprising how many steps and how much hands-on work still goes into each individual piece. Once upon a time, there were employees at Kri Kri Studio. Today, it is only me. Fortunately, I have come to enjoy the strategy of producing large orders and, having gained a pretty good understanding of the processes involved, become quite efficient at it. Equally important, the quality of my work has gone up. My designs and products are continually evolving. Creating at Kri Kri Studio remains my passion and I still think it’s still fun.

Here you see my pouring table full of mug molds that have just been filled with slip, and tipped out. They are sitting on the wooden rails of the pouring table. The table is designed to let the slip drain from the molds, through the rails and through a hole in the basin, into the bucket below. That slip can be re-used and recycled.
While I was waiting, I made the handles which are rolled out from a damp ball of clay. They will need to firm up before they can be attached to the mugs.
 Timing is critical each step of the way. Moving too fast will cause things to warp. Wait too long and your pieces will crack or break when you do the final shaping or attaching.
It will be a few days now until these pieces are dry enough to sand and sponge so that they can be painted with under glazes and then be decorated.
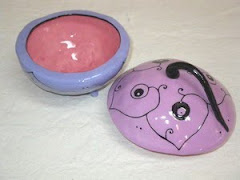
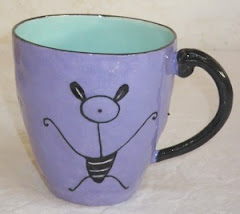
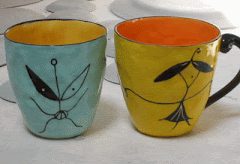
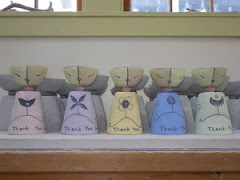
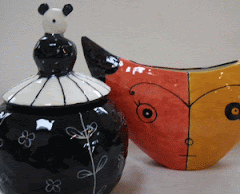
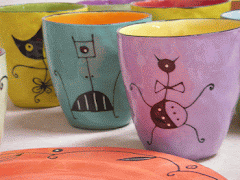
At last, they are ready for the bisque firing which will remove the chemical water and make the item hard. I've painted the black trim on handle and rim as well as decorated the mug with a kri kri creature by trailing black slip with a squeeze bottle.
The firing in my electric kiln takes just inder 24 hours. This includes cooling down time.
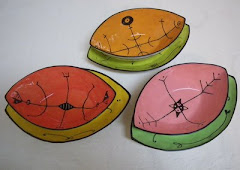
The final step to a finished product is the gloss glazing. I dip items like mugs and bowls into a bucket of glaze. For the flatter things, such as plates, I brush 2 to 3 layers of gloss glaze onto each side. The glaze layer should dry overnight before firing the item.

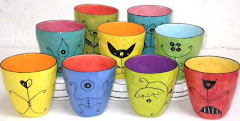
Glaze firings take slightly less time but are similar to bisque firings. They must cool down even more slowly to avoid cracking. Opening a glaze firing is always exciting. One unloads the shelves layer by layer and if all went well there is a new batch of juicy ceramics to behold! Now, how long did that take? I'm not sure either. But one would be hard pressed to make a mug in a week!
Over the years I've acquired tools to facilitate production, yet it is surprising how many steps and how much hands-on work still goes into each individual piece. Once upon a time, there were employees at Kri Kri Studio. Today, it is only me. Fortunately, I have come to enjoy the strategy of producing large orders and, having gained a pretty good understanding of the processes involved, become quite efficient at it. Equally important, the quality of my work has gone up. My designs and products are continually evolving. Creating at Kri Kri Studio remains my passion and I still think it’s still fun.

Here you see my pouring table full of mug molds that have just been filled with slip, and tipped out. They are sitting on the wooden rails of the pouring table. The table is designed to let the slip drain from the molds, through the rails and through a hole in the basin, into the bucket below. That slip can be re-used and recycled.
 |
| waiting to become firm |
After the slip has stiffened up enough not to tear, I have carefully removed these "skins" from the molds and will later trim them to mug height.
 | ||
| notice the wooden measuring block and palette knife for cutting |

 |
| painting 3 coats of under glaze |
It will be a few days now until these pieces are dry enough to sand and sponge so that they can be painted with under glazes and then be decorated.
At last, they are ready for the bisque firing which will remove the chemical water and make the item hard. I've painted the black trim on handle and rim as well as decorated the mug with a kri kri creature by trailing black slip with a squeeze bottle.
 |
| mug without trim or decoration and decorated, unfired mug |
 |
| this green coat will become clear gloss when fired! |

Glaze firings take slightly less time but are similar to bisque firings. They must cool down even more slowly to avoid cracking. Opening a glaze firing is always exciting. One unloads the shelves layer by layer and if all went well there is a new batch of juicy ceramics to behold! Now, how long did that take? I'm not sure either. But one would be hard pressed to make a mug in a week!


.gif)
.jpg)


detail.gif)


3 comments:
That's amazing! We enjoyed reading about the process. Your work very original and beautiful.
I found one of your hearts from 1999 in a teen center and bought it as fast as I could. You love to send you a picture.
I found one of your hearts from 1999 in a teen center and bought it as fast as I could. You love to send you a picture.
Post a Comment